Steps to launch i.am.retailer eCommerce app
1. To change the App Name:
Change your app name in string.xml file
app/src/main/res/values/strings.xml --> app_name
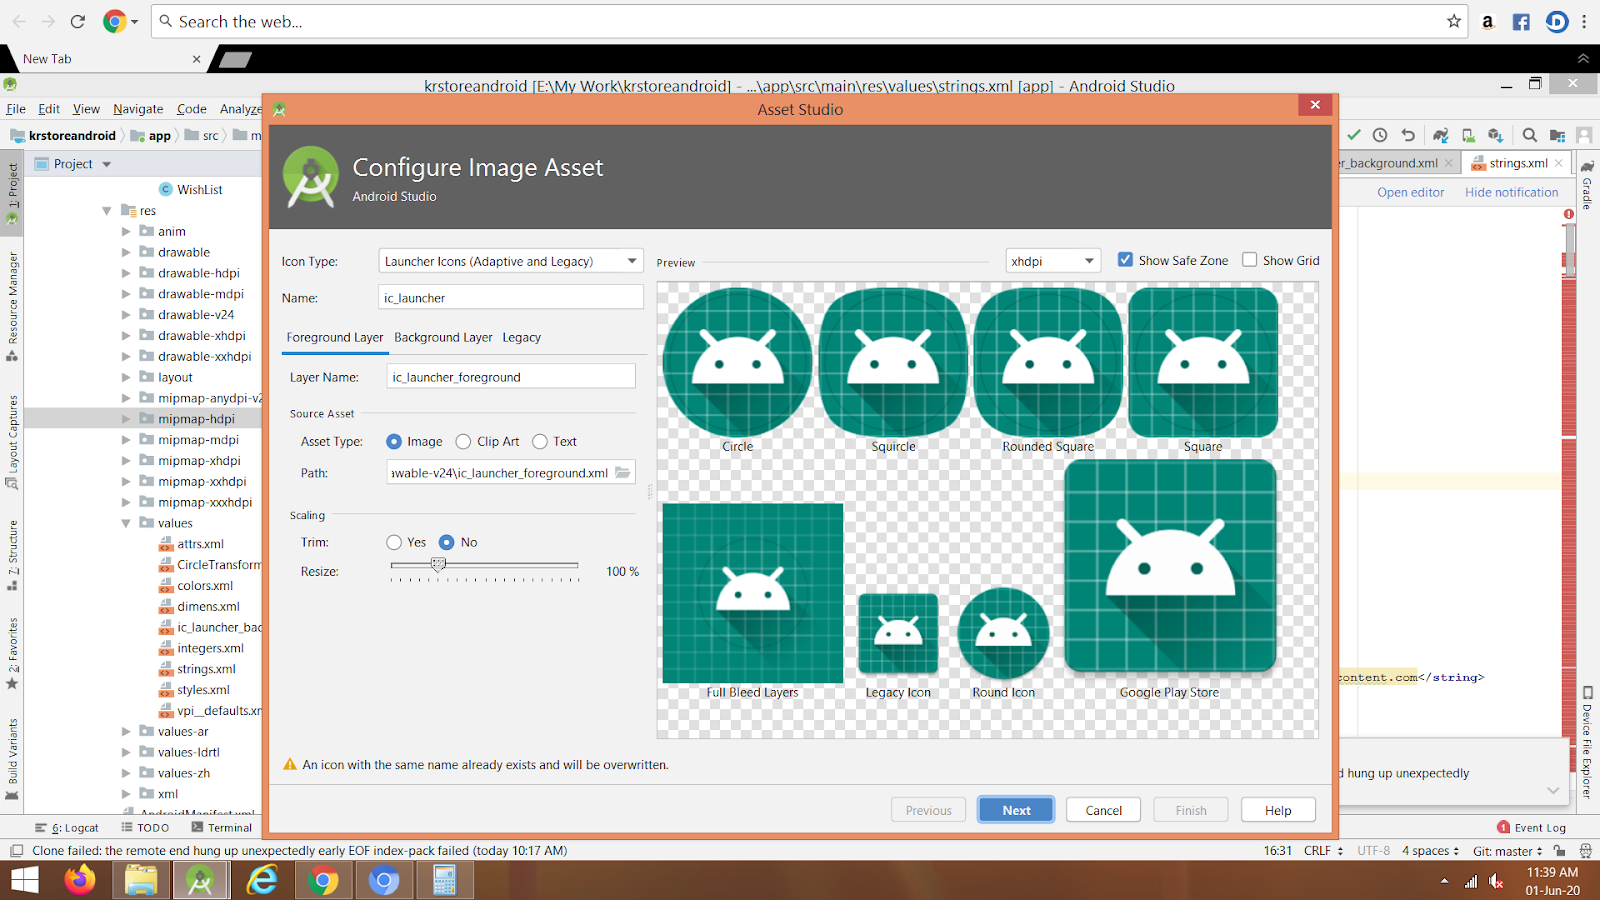
2. To change App icon:
Change app icon (ic_launcher) in all app/src/main/res/res/mipmap folders. For that do below steps
- Get one xxhdpi app icon with the size 192 × 192
- Right click on res/mipmap folder-->Click New-->Click Image Asset-->Image Asset window will open
- In path add your icon path and check all size icons ready by change above preview size dropdown and click finish button.
Reference link
https://developer.android.com/studio/write/image-asset-studio#access
3. To Change App Logo:
Change app logo (logo_image.png) in all mipmap folders under app/src/main/res.
4. To Change Package name:
Follow below link to change package name
https://stackoverflow.com/questions/16804093/rename-package-in-android-studio
5. To Change App theme colors:
Change your app color in colors.xml file under app/src/main/res/values folder.
Place color code in ColorPrimary, ColorPrimaryDark and ColorAccent
<color name="colorPrimary">#03a897</color>
<color name="colorPrimaryDark">#03a897</color>
<color name="colorAccent">#02599D</color>
6. To Change Domain Name & value key:
Change domain name and key in Appconstatants.java file under app/src/main/java/<package>/Common folder
 public static String value = "<key_generated>";
 public static String domain = "<domain_name>/";
7. Change icons:
Provide color code and get your app themed icons from the design person and replace that in mipmap(hdpi) folder if you want to change the pink icons to your theme color.
8. Facebook id change:
a. Add below line in Splash activity ,replace your package name and run app and get hash key log
try {

PackageInfo info = getPackageManager().getPackageInfo(“YOUR_PACKAGE NAME", PackageManager.GET_SIGNATURES);

for (Signature signature : info.signatures) {

MessageDigest md;

md = MessageDigest.getInstance("SHA");

md.update(signature.toByteArray());

String hashkey= new String(Base64.encode(md.digest(), 0));

Log.e("hash key", hashkey);

}

} catch (PackageManager.NameNotFoundException e1) {

   Log.e("name not found", e1.toString());

} catch (NoSuchAlgorithmException e) {

   Log.e("no such an algorithm", e.toString());

} catch (Exception e) {

   Log.e("exception", e.toString());

}
b. Copy the hash key from logcat and save for your Facebook account creation
c. follow the procedure to create app in Facebook https://developers.facebook.com/docs/facebook-login/android and add the hash key there. It will return the app id
d. Place that facebook app id in facebook_app_id and fb_login_protocol_scheme String.xml file . in fb_login_protocol_scheme append “fb” with facebook_app_id.
<string name="facebook_app_id">your facebook id</string>

<string name="fb_login_protocol_scheme">fb{your facebook id}</string>
9.One signal id change
a. Provide your app package name and Get Onesignal id
Reference link to get one signal id
https://documentation.onesignal.com/docs/generate-a-google-server-api-key
b. Place that id in app build.gradle
manifestPlaceholders = [

onesignal_app_id               : 'YOUR_ONESIGNAL_ID',

// Project number pulled from dashboard, local value is ignored.

onesignal_google_project_number: 'REMOTE'

]
10. Firebase Google service JSON file change
https://support.google.com/firebase/answer/7015592?hl=en
a. In this above link you can see the procedure to get google service json file under Get config file for your Android app topic.
b. After download, the google service JSON key, paste that file in your project app folder
11. Generate Apk with new Keystore
https://developer.android.com/studio/publish/app-signing#sign-apk
12. Play store upload:
https://support.google.com/googleplay/android-developer/answer/113469?hl=en follow this link to upload your app to playstore.
If you require our launching support kindly raise ticket at support.iamretailer.com
Related Articles
Why i.am.retailer is your best eCommerce platform?
Imagine sitting in the comfort of your shop and dealing with a customer who lives 1,000 miles away from you over the phone. Gone are the days when people thought it was impossible, but the post-COVID era, where everything is digital, has made ...License Activation
After purchasing the app, you will receive an email containing the App kit with the activation code, which will be used to activate and open the app from activation mode. This email will be sent to the same email address you specified when ...App Export - i.am.retailer Store Admin Panel
i.am.retailer allows you to create and modify your App Store with the theme you like. This will helps you to fully control your App Store management. Let's take a look at how to create and export your app one by one First, log in to your Store Admin ...End to End Support how the server migration and App Launch will be?
I can host the setup on your server if supported or I can also buy the Server & Domain and host the project in it. And Reg app launch I can upload app on to your account as well as to my account.Does i.am.retailer mobile app use the same Opencart website Admin panel or need a seperate one?
Same Admin panel which is used for the website can be linked to the i.am.retailer app also. No separate admin is required for the existing Opencart website. We additionally provide the Opencart admin panel in the product for new Mobile-First ...